


|
||||||||||||||||||||||
|
||||||||||||||||||||||
|
||||||||||||||||||||||
|
|
|||||||||||||||||||||
• Step-by-step Instructions
Building an All Wire Finch Cage

• Tools Needed
1. Cutting wire
2. Bending
3. "J" clips
4. Doors
5. Finishing touches
| • Wire Cutters | • Regular Pliers | • File |
| • Clip Pliers | • (2) "C" Clamps | • (2) 3' length 2"x4", to be used as a brake |
| • Rubber Mallet | • Hammer | • Permanent Marker |
| • 8' of 36" wide, 1"x1/2" wire | • "J" Clips approx 1 pound | • (2) Finger Loops Springs |
| • Door Guard, 3' | • (2) Handles | • (2) 18" x 15" x 1-1/2" Trays |
|
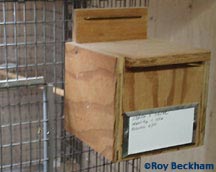
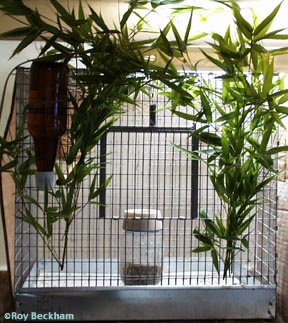
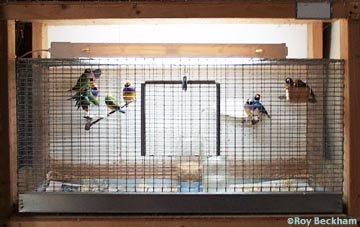
Step-by-step Instructions These instructions are for building an all wire finch cage. I use a 1/2" x 1" 16 gauge wire that is available in standard 24", 36" and 48" widths. For this cage, I use the 36" width wire. This will allow you to build 2 cages with the final dimension of 18" wide x 15" deep x 17" high. 1. Cutting Wire Next, cut off the "stubs" to end up with an even end on the remaining wire. Cut off a 18" piece. From this piece, cut off two 15" sections. The last piece to cut is a 2" piece. So from that 18" section you should end up with two 18" x 15" sections and one 2" x 18" section. Repeat this process for one more 18" section, but you will not need another 2" x 18" section. Lastly, from the remaining section of wire, you will cut the doors for the cages. Here you have a choice. Many people like for the door to overlap the opening. I like for the door to fit the door opening with no overlap. Your choice. I make a 6" x 6" opening so I cut a 6' x 6" door. You can make this larger if you have difficulty working with a 6" opening. So whether you want a door overlap or larger door, cut the size door you want from the remaining piece. Before moving on to bending and joining pieces, you may want to dull the sharpened points from the wire you've cut with a file. You should now have (2) 17" x 66", (4) 18" x 15", (2) 2" x 18" and (2) 6" x 6" (or larger) sections. 2. Bending To more easily bend the wire, you can create a wire "brake" by clamping together two 2" x 4" boards. You can clamp both ends of the 2x4's together, or put a hinge on one end and clamp the other. By placing the wire between the two 2x4's, the wire is easily bent at the joint. The first piece to bend is the tray door. Stick the 2" x 18" section in the brake. Bend over 1/2" all along the 18" length. (photo 3) Cut off 1" from the "L" shaped door so that the final length is 17". This will allow it to fit in the opening with 1/2" on either side. Now mark the 17" x 66" section to begin making the corner bends. The front is already marked by the 18" tray opening. Now mark a 15" length, then a 18" length and then there should be 15" left. Slide the wire between the 2x4's and bend the wire to 90 degrees at each of the marks (photo 4). This should create a square forming the front, back and two sides of the cage. (photo 5). 3. "J" Clips Start by joining the sides of the wire that was just bent. I usually place a clip every 3" or so. After joining the sides of the cage, it's time to add the top and bottom. (photo 6) I use the clips pretty liberally when joining the top and bottom. This helps keep everything nice and tight to hold the shape of the cage better. 4. Doors Now attach the main door. Here you have a choice as to which way you would like the door to swing. Some like to hinge the door at the top so that when you let it go, it shuts. Others like to hinge the door on the right or left side like a regular house door. I like to hinge my cages at the bottom (and I may be the only one. Seems everytime someone sees my cages they make a comment about that). I find it easier to reach into the cage if I don't have it scraping against my wrist. Hinge the door any way you desire. Once again, don't crimp too tight or the door won't swing freely (photo 8). You can see the padded bicycle gloves I wear and the extra padding I have added to my pliers as I attach a door (photo 9). 5. Finishing Touches If you don't like to file the stubs of the wire you've cut or snap your net or hand on them in the door opening, you can clean up the edges with door guards. Simply cut this stuff to length and slide it over the wire. Makes for a professional finish on the doors (photo 10). You can also file the stubs and forgo the door guards. It provides an unobstructed view of the birds (photo 11). I add a handle to the top to make the cage easier to carry around. You can buy wire handles with vinyl covers on that are easy to attach or you can rip off the handle from a paint can. Either one works and I don't think the birds care. I use a spring to keep the door shut. The spring that I use has a big loop that's easy to grab. There are other door springs. One popular style uses the "J" clips or cage rings to attach it to the door. These are okay and close the door securely, but can be difficult to manipulate if you have your hands full (as I often do when I'm putting egg food in the cage) or suffer from arthritis like my mom. I use a coiled spring with a loop and hook (photo 12). Lastly, add the perches (natural branches or dowels), outside feed/watering devices if you choose, nest basket or box (placed inside or outside), put some paper in the bottom and the birds are all set! The above directions and materials will make (2) 18"w x 15"d x 17"h cages. I use these cages for a variety of purposes, from quarantine for new arrivals, sorting, temporary storage, transporting, rehabilitation and as my main breeding cage. Nearly every species I breed is bred in these "small breeders". For those more timid species, I will add some cover from some cut bamboo branches. Here, some Rufous-backed mannikins are breeding in this cozy cage (bamboo cage). Although I breed many species in the smaller cages, I like to rest, or flight my birds in cages that are at least 36" long (flight1). You may want to build larger cages to fit a particular location. For these cages, the construction is much the same as the smaller cages. There is one notable change in producing the 36" x 18" x 17" cages that I build. Instead of "wrapping" the wire to create the front, back and sides, I bend the wire to produce the front, back and top, bottom. The attached sections then form the sides rather than the top/bottom as in the smaller cage. The same principles in either the small cage or longer flight cage construction can be easily applied to other cage dimensions. You can also use the 24" or 48" standard wire widths to decrease the amount of cutting and fastening required, if these dimensions better suit your needs. |
Morton Jones (800) 443-5769
• Cage Clip Pliers (CP203)
• "J" Clip (CC1)
• Finger Loop Springs (LOOP-S)
• Door Guards (PDG3)
• Cage Handles (PCH50)
• 18" x 15" x 1-1/2" Trays (AT185)
• 1/2" x 1" Galvanized wire 100' Roll (AW121636)
Cutler's Pheasant Supply (810) 657-9450
GQF Manufacturing (912) 236-0651
Stromberg's Chicks & Gamebirds Unlimited (800) 720-1134
